Ready to obtain a visa for your trip to the United States? You've come to the right place.
Here are the eight steps you'll need to take to obtain your U.S. visitor visa from India. You'll learn how to complete the electronic DS-160 application, how to schedule your visa interview, and what documents you need to take with you to your appointment.
Step 1: Determine What Type of U.S. Visitor Visa You Need
If you wish to apply for a U.S. visitor visa from India, you'll need to obtain a nonimmigrant visa good for a temporary stay.
There are two main types of U.S. visitor visas:
1. B-1 Visa (for Business)
A B-1 business visa permits you to take part in the following activities:
- Consult with business associates
- Negotiate a contract
- Settle an estate
- Attend a convention or conference
2. B-2 Visa (for Tourism)
A B-2 tourist visa permits you to take part in the following activities:
- Tour the U.S.
- Vacation or holiday
- Visit friends or family
- Participate in social events, musical events, sporting events, or contests (must be amateur level and you must not get paid for participating)
- Take a short recreational course that does not count for credit toward a degree
- Seek medical treatment
You may also enter the United States for a combination of business and tourism on a B-1/B-2 visa.
Learn about the other types of nonimmigrant visas for U.S. travel.
Step 2: Determine Where You Will Apply for Your U.S. Visitor Visa in India
Before you start the process of obtaining a visitor visa for the U.S. from India, there are a few steps you must take. The first is to determine at which U.S. consulate or embassy you will apply. You will need this information to begin your DS-160 visa application.
There are currently four U.S. consulates and one U.S. embassy located in India. You will apply at the embassy or consulate most convenient for you:
U.S. Consulate General Chennai
- Address: Gemini Flyover, Teynampet, Chennai, Tamil Nadu 600006, India
- Phone Number: +91 44 2811 2000
U.S. Consulate General Hyderabad
- Address: Paigah Palace, 1-8-323, Chiran Fort Club Ln, Patigadda, Begumpet, Secunderabad, Telangana 500003, India
- Phone Number: +91 40 4033 8300
U.S. Consulate General Kolkata
- Address: 5/1, Ho Chi Minh Sarani, Kankaria Estates, Park Street area, Kolkata, West Bengal 700071, India
- Phone Number: +91 33 3984 2400
U.S. Consulate General Mumbai
- Address: C49, G Block Rd, G Block BKC, Bandra Kurla Complex, Bandra East, Mumbai, Maharashtra 400051, India
- Phone Number: +91 22 2672 4000
U.S. Embassy New Delhi
- Address: Panchsheel Marg, Shantipath, Chanakyapuri, New Delhi, Delhi 110021, India
- Phone Number: +91 11 2419 8000
Step 3: Gather the Information You Will Need to Complete the Online Nonimmigrant Visa Application for the U.S.
You may need the following documents to complete the electronic DS-160 U.S. visa application:
- Passport
- Travel itinerary (if you have already made travel plans)
- Dates of your previous 5 visits to the United States (if applicable) and details of any additional international travel you've taken within the past 5 years
- Information about your current and/or previous work and/or education history
- Photograph that meets the required specifications
Here Are the Requirements for Your DS-160 Application Photo:
- Must have been taken within the six months prior to submitting your application and must reflect your current appearance
- Must be in color
- Must be taken in front of a plain white or off-white background
- Must be sized so that your head is between 50% and 69% of the image's total height from the bottom of your chin to the top of your head
- You must be directly facing the camera with a neutral facial expression, both eyes open, and no shadows on your face
- You must not wear a hat or head covering that obscures your hairline, unless your covering is worn for religious purposes
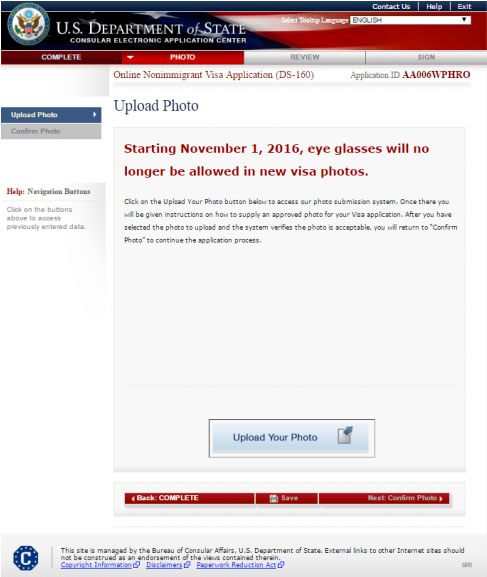
- You must not wear eyeglasses in your photo
Note that photos scanned from driver's licenses or other official documents are not acceptable. Low-quality vending machine photos, mobile phone photos, and full-length photographs are not acceptable.
Review these passport photo examples from the U.S. Department of State to see acceptable and unacceptable photos.
Step 4: Complete and Submit the Electronic DS-160 Application
The next step to getting your U.S. tourist visa in India is to fill out and submit the DS-160 online.
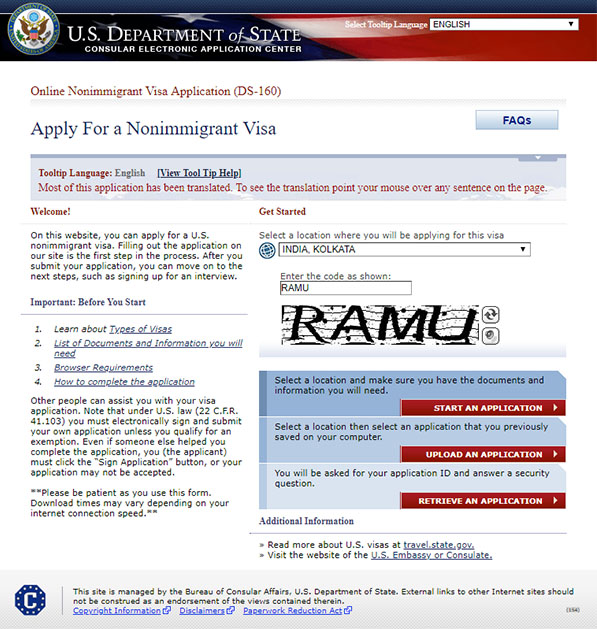
Visit the U.S. Department of State Consular Application Center website to apply for your U.S. visa in India. Use the dropdown options under the "Get Started" header to select the location in India where you will apply for your U.S. visitor visa.
Options include:
- India, Chennai
- India, Hyderabad
- India, Kolkata
- India, Mumbai
- India, New Delhi
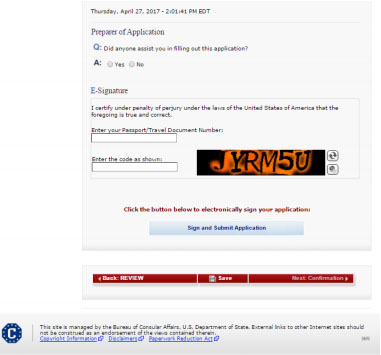
In the second blank box, enter the code as shown. Then click the red box that says, "Start an Application."
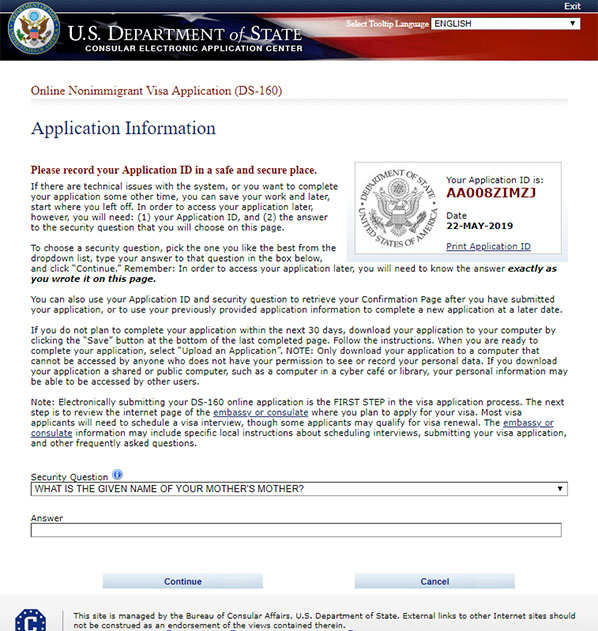
The "Application Information" page will appear next. Write down or print your application ID that appears in the upper righthand corner. Then choose and answer one of the security questions toward the bottom of the page.
The next page begins the DS-160 application. Fill out each page of the application truthfully and completely. Note that your personal information must match your information as it is written in your passport exactly.
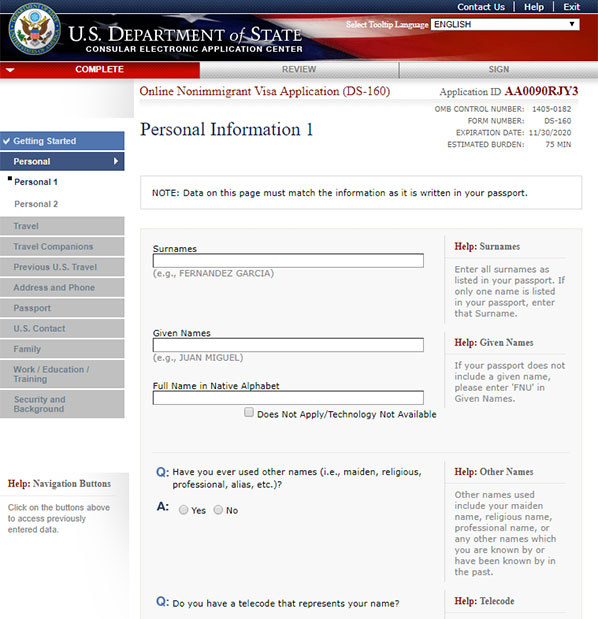
You will fill out information regarding your:
- Personal information
- Address and phone number
- Passport
- Travel
- Travel companions
- Previous U.S. travel
- S. contact
- Family
- Work, education, or training
- Security and background
Toward the end of the application process, you will be prompted to upload your DS-160 application photo.
Next, you will review each of your answers on each page of the application. Read through your answers carefully to ensure they are accurate and your application is complete.
Finally, you will be prompted to sign and submit your application. You will sign your application electronically by clicking the "Sign and Submit Application" button.
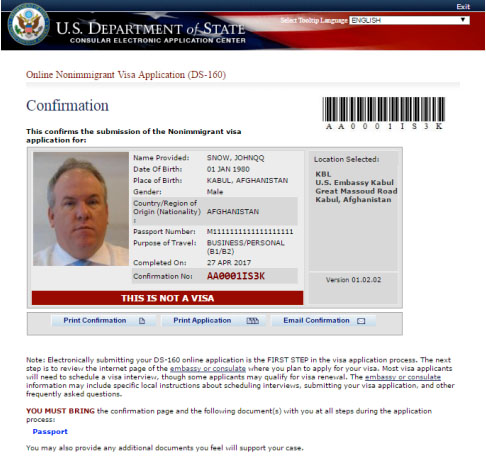
A confirmation page will appear after you sign and submit your application. Print this page and bring it with you to your U.S. visa appointment in India.
You can preview the entire U.S. visitor visa application here.
Tips for Filling Out the DS-160 Application for a U.S. Visitor Visa from India
Browser Requirements
- Use Internet Explorer 11 or higher or Google Chrome 58 or higher to complete the application. Safari is not supported.
- JavaScript and Transport Layer Security (TLS) must be enabled.
- Your browser must support 128-bit encryption.
Other Tips
- Make sure you have uninterrupted access to a computer for 30-60 minutes to complete the application. If you stop working on the application for more than 20 minutes, the session will expire and you will need to start over. However, each page should save automatically.
- Write down the application ID number at the top righthand corner of the page. You will need it if you wish to save your application and return to it later.
- Type your answers in English using only the English alphabet. The only exception is when you are asked to provide your full name; you may use non-English characters to type your name.
- Print out and keep the DS-160 barcode page that appears after you successfully submit your application. Bring this with you to your U.S. visa appointment in India.
See DS-160 frequently asked questions and answers to learn more about the application process for a U.S. visitor visa from India.
Step 5: Pay the U.S. Visitor Visa Application Fee
The next step after completing the DS-160 is to pay the non-refundable visa application fee. The current U.S. tourist visa fee for most non-petition-based nonimmigrant visas is $160.
See the U.S. Department of State's "Fees for Visa Services" page to learn more about visa fees.
You may pay your visa fee through www.ustraveldocs.com/in. Note that you have several options for paying the U.S. visitor visa fee:
- National Electronic Funds Transfer (NEFT)
- Payment by mobile phone
- Payment at AXIS Bank / Citibank
- Payment at DRUK Bank
Visit the site's "Bank and Payment Options/Pay My Visa Fee" page for payment details. Then follow these steps to pay the fee:
- Visit the "New User Registration - India" page to create a profile on the site.
- Then click the "Schedule Appointment" option.
- On the payment confirmation screen, you will see payment options and details on how to make a payment. (Note it can take up to 2 business days for your receipt to be activated from your time of payment.)
- Keep the receipt for the fees you pay. You will need it to schedule your appointment.
Step 6: Schedule Your U.S. Visa Appointment in India
Interviews are generally required for most U.S. visitor visa applicants from India — especially for those between the ages of 14 and 79.
If you are:
- Age 80 or older — interview is generally not required
- Age 14 - 79 — interview is generally required (there are some exceptions for visa renewals)
- Age 13 or younger — interview is generally not required
Where to Schedule Your U.S. Visitor Visa Interview
You should schedule your U.S. visa appointment at the U.S. embassy or consulate nearest to where you live in India. Ideally, this should be the same embassy or consulate you selected on your DS-160 visa application as the location in India where you will apply for your U.S. visitor visa.
However, if you need to make your interview appointment at another U.S. embassy or consulate, its officials should be able to access your application form using the barcode on your DS-160 confirmation page. Be sure to bring this confirmation page to your appointment.
Review the one U.S. embassy and four U.S. consulates located in India in "Step 2" above.
Check the Appointment Wait Time for Your Chosen Embassy or Consulate
You can visit the "Visitor Visa" page from the U.S. Department of State to check the appointment wait time for your chosen embassy or consulate.
Scroll down to the gray box that contains the "Appointment Wait Time" header. Type the name of your selected city and click it when it pops up. See an example of visa wait times for Mumbai below.
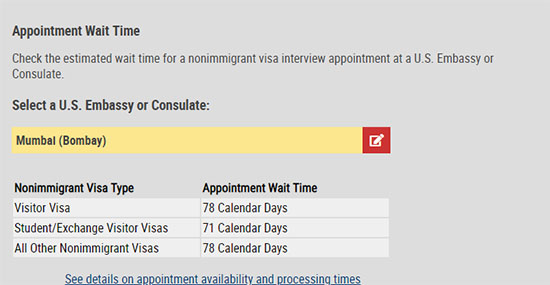
Wait times for interview appointments vary by location, season, and visa category, so be sure to apply for your visa early.
How to Schedule Your U.S. Visitor Visa Interview
You must schedule two appointments for your U.S. visitor visa:
- One appointment at the Visa Application Center (VAC)
- One visa interview at the Embassy or Consulate
Visit www.ustraveldocs.com/in and follow the steps below to schedule your appointments:
- In the first pop-up box, choose whether it's your first time applying for a visa through the site.
- In the second pop-up box, select "Nonimmigrant" if you are applying for a U.S. visitor visa.
- On the resulting page, scroll down to "Step 4" and click "login."
- Log in using the same credentials you used to pay your visa fee.
- On the resulting dashboard page, click "Schedule Appointment" on the left-hand menu. This will start the process for scheduling your appointment.
- Schedule your appointment at one of the five Visa Application Centers. Here you will have your fingerprints and photo taken. (This appointment must be at least one day before your visa interview appointment.)
- Schedule your visa interview appointment at the Embassy or Consulate.
Note that you will need three key pieces of information to schedule your appointment:
- Your passport number
- Your visa application fee receipt number
- The ten-digit barcode number on your DS-160 application confirmation page
Step 7: Attend Your Visa Application Centre Appointment
Attend your scheduled appointment at the Visa Application Centre to have your photo and fingerprints taken. Bring the following documents with you:
- Passport that is valid for at least six months beyond the date you plan to leave the U.S.
- DS-160 application confirmation page
- One photograph as per U.S. visa specifications (See photo requirements under "Step 3" above.)
Step 8: Attend Your Visa Interview
Attend your scheduled U.S. visitor visa interview at your U.S. embassy or consulate in India. Bring the following documents with you:
- A printed copy of your appointment confirmation letter
- Your DS-160 confirmation page stamped at the Visa Application Centre
- Your current passport (and any old passports)
- Any supporting documents
Be ready to answer questions about your intended visit and be sure to take all the required documents.
Also note the following:
- You are not permitted to take friends, relatives, attorneys, or business contacts to your nonimmigrant visa interviews.
- Children under 14 years old are not required to attend either appointment.
Good Luck and Enjoy Your Trip to the U.S.!
Get your free Guide to U.S. Cultures and Customs. Discover need-to-know information about food, clothing, and laws in the U.S. Plus, learn etiquette tips to help you interact with locals and sound like a native!